Private Communication - GCP Private Service Connect
GCP Private Service Connect
GCP Private Service Connect allows you to open a path to Temporal without opening a public egress. It establishes a private connection between your Google Virtual Private Cloud (VPC) and Temporal Cloud. This one-way connection means Temporal cannot establish a connection back to your service. This is useful if normally you block traffic egress as part of your security protocols. If you use a private environment that does not allow external connectivity, you will remain isolated.
Set up Private Service Connect with Temporal Cloud with these steps:
-
Open the Google Cloud console
-
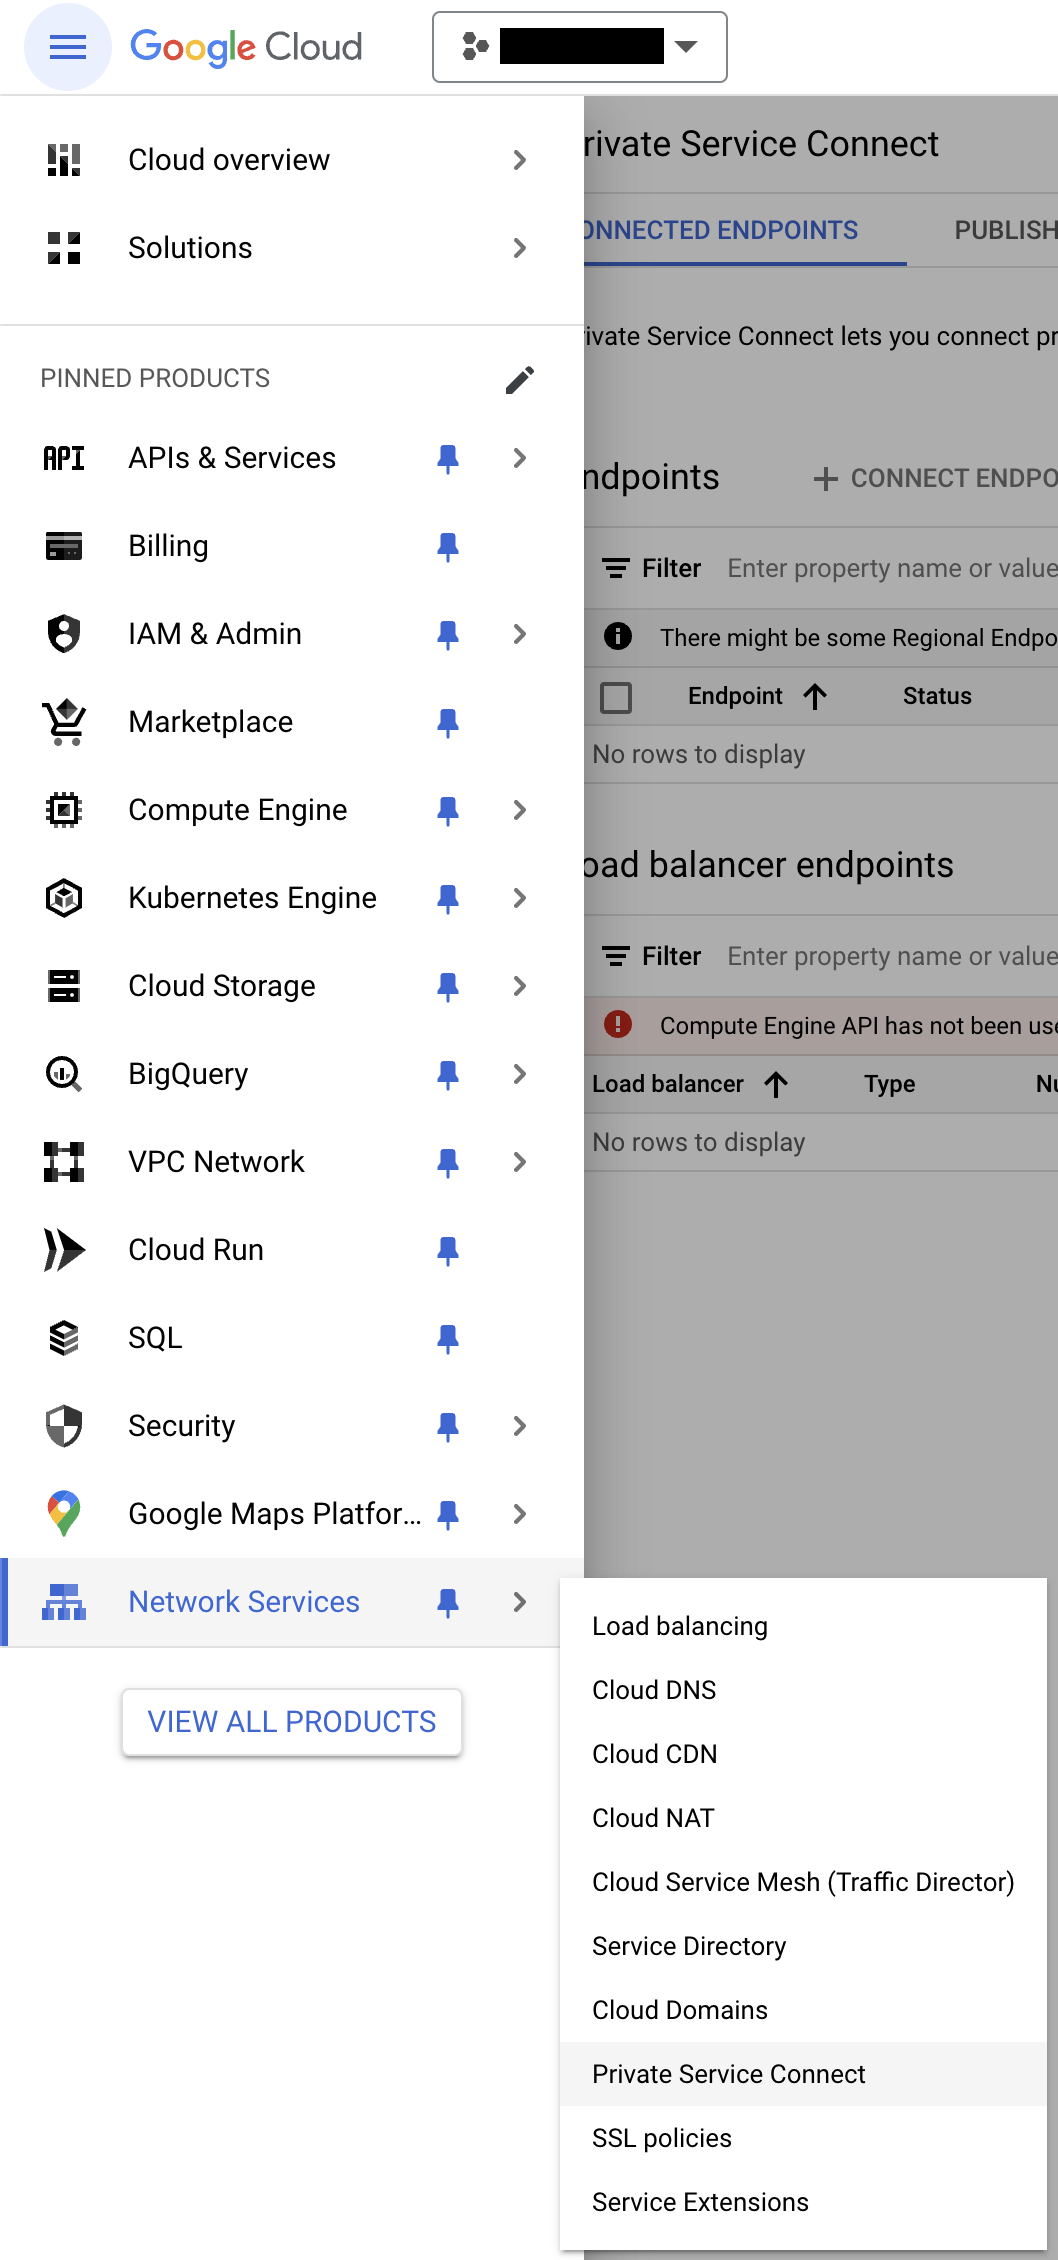
Navigate to Network Services, then Private Service Connect. If you haven't used Network Services recently, you might have to find it by clicking on View All Products at the bottom of the left sidebar.

-
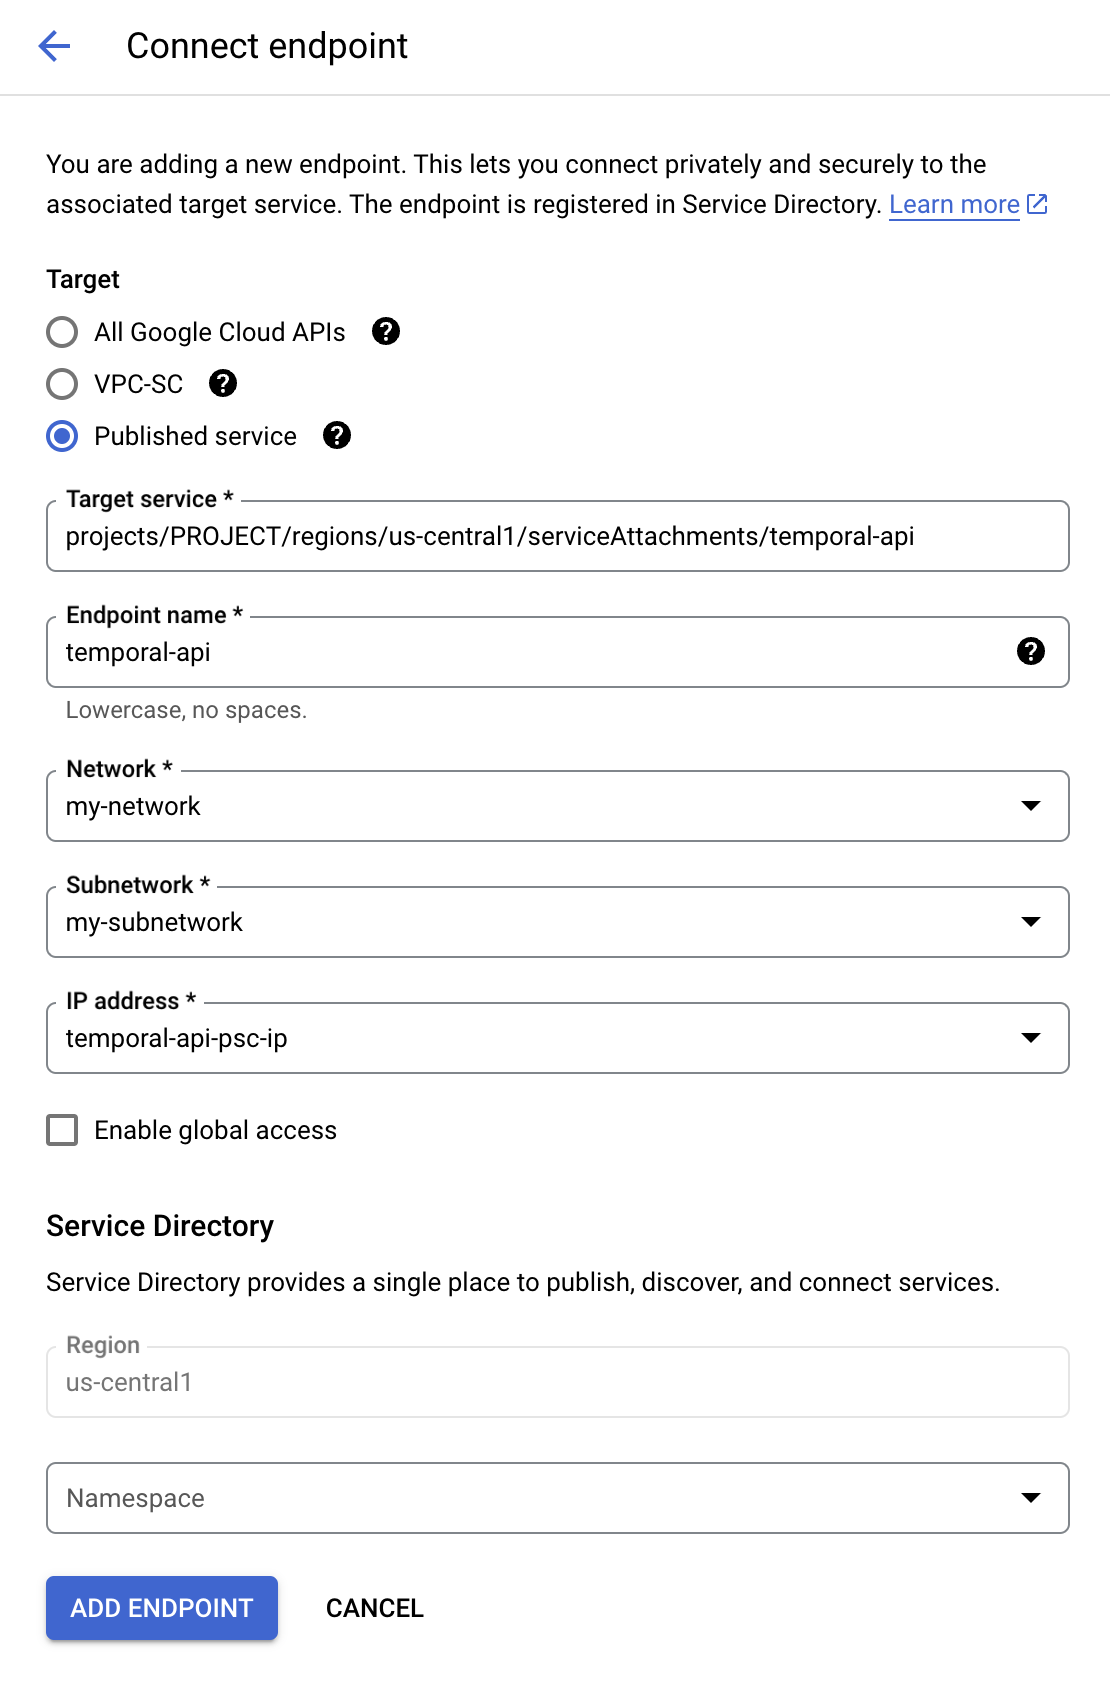
Go to the Endpoints section. Click on Connect endpoint.

-
Under Target, select Published service, this will change the contents of the form to allow you to fill the rest as described below

-
For Target service, fill in the Service name with the Private Service Connect Service Name for the region you’re trying to connect to:
Region Private Service Connect Service Name us-central1projects/PROJECT/regions/us-central1/serviceAttachments/temporal-apiaustralia-southeast1projects/PROJECT/regions/australia-southeast1/serviceAttachments/temporal-api -
For Endpoint name, enter a unique identifier to use for this endpoint. It could be for instance
temporal-apiortemporal-api-<namespace>if you want a different endpoint per namespace. -
For Network and Subnetwork, choose the network and subnetwork where you want to publish your endpoint.
-
For IP address, click the dropdown and select Create IP address to create an internal IP from your subnet dedicated to the endpoint. Select this IP.
-
Check Enable global access if you intend to connect the endpoint to virtual machines outside of the selected region. We recommend regional connectivity instead of global access, as it can be better in terms of latency for your workers.
-
Click the Add endpoint button at the bottom of the screen. If successful, the status of your new endpoint will appear as Accepted. Take note of the IP address that has been assigned to your endpoint, as it will be used to connect to Temporal Cloud.
-
You can use GCP Private Service Connect. You can use the IP address of the previous step to connect to Temporal Cloud using port 7233. To establish a valid mTLS session, you must override the TLS server name used for the connection to
<namespace>.<account>.tmprl.cloud.
GCP Private Service Connect services are regional. Individual Namespaces do not use separate services.
Once set up, you can test your Private Service Connect connectivity using the following methods.
When connecting, you must override the TLS server name to target your Namespace’s individual hostname (<namespace>.<account>.tmprl.cloud) to establish a valid mTLS session:
-
The Temporal CLI, using the
--tls-server-nameparameter to override the TLS server name. For example:temporal workflow count \
--address <IP address of the PSC endpoint>:7233 \
--tls-cert-path /path/to/client.pem \
--tls-key-path /path/to/client.key \
--tls-server-name <namespace>.<account>.tmprl.cloud \
--namespace <namespace> -
Non-Temporal tools like grpcURL, useful for testing from environments that restrict tool usage, using the
-servernameparameter to override the TLS server name. For example:grpcurl \
-servername <name>.<account>.tmprl.cloud \
-cert /path/to/client.pem \
-key /path/to/client.key \
<IP address of the PSC endpoint>:7233 \
temporal.api.workflowservice.v1.WorkflowService/GetSystemInfo -
Temporal SDKs, by setting the endpoint server address argument to the Private Service Connect endpoint (
<IP address of the PSC endpoint>:7233) and using the TLS configuration options to override the TLS server name.